How to convert PDF to JPG on Windows, Mac, iPhone and Android
How to convert PDF to JPG on Windows 11, Mac, iPhone and Android, which dpi to pick (with A4 pixel sizes worked out) and what happens to multi-page PDFs.
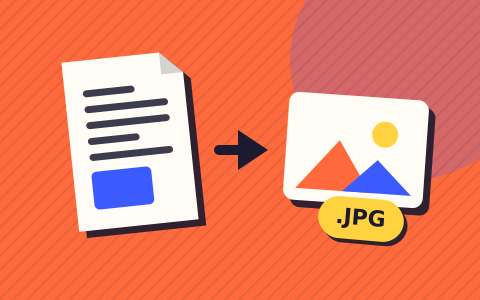
To convert PDF to JPG, open the file in a converter that draws each page as an image, choose a resolution (150 dpi suits most uses) and save. On a Mac, Preview does it with File > Export, and on iPhone (iOS 26 or later) the Preview app has Export too. On Windows 11 and Android, the quickest route is to convert the PDF to JPG in your browser, where the file stays on your device.
The browser method (works on every device)
Lokafile’s converter runs in the browser, so it behaves the same on a Windows laptop, a MacBook, an iPhone or an Android phone. The PDF is read by a PDF renderer inside the page and is never uploaded. It’s free and there’s no account.
- Open Lokafile’s PDF to JPG tool and drop the PDF in, or tap to choose it.
- Pick a quality: Screen (72 dpi), Standard (150 dpi) or Print (300 dpi).
- Leave the Pages box empty for every page, or type the ones you want, such as
1-3, 5. - Press Convert. A single page downloads as a JPG; several pages download as a zip.
Password-protected PDFs need unlocking first, because the renderer can’t open them.
How to convert a PDF to JPG on Windows 11
Windows 11 opens PDFs in Microsoft Edge by default, and Edge’s PDF reader can view, highlight, draw on and fill in PDFs. Microsoft’s feature list for the Edge PDF reader has no option to save a page as an image, though. That leaves two practical choices.
The first is the browser tool above, which gives you a proper JPG at the resolution you pick.
The second is a screenshot. Open the PDF, fit the page to the window, then press Windows logo key + Shift + S to open the Snipping Tool overlay and drag around the page. Microsoft’s Snipping Tool guide says the snip is saved automatically to your Screenshots folder, and you can use Save as for a copy elsewhere.
The catch is resolution. A screenshot can only hold as many pixels as your screen shows. On a 1080p monitor, a whole A4 page fitted to the window is roughly 1080 pixels tall at best, which is under a third of the height of the same page at 300 dpi. Zooming in helps the text, but then the page no longer fits in one capture. Fine for a quick look, poor for anything you need to read or print.
How to convert a PDF to JPG on a Mac with Preview
Preview is built into macOS and handles this without extra software. Apple’s guide to converting file types in Preview gives these steps:
- Open the PDF in Preview.
- Choose File > Export.
- Click the Format pop-up menu and choose JPEG.
- Adjust the quality slider, type a name or choose a location, then click Save.
Apple’s guide doesn’t describe a resolution setting or say how pages of a multi-page PDF are handled, so check the file you end up with. If you need every page as its own image at a known dpi, the browser tool does all of them in one go.
On iPhone and Android
From iOS 26, the iPhone has its own Preview app. Apple’s page on exporting PDFs in Preview on iPhone lists these steps:
- Open the PDF in the Preview app.
- Tap the button next to the file name, then tap Export.
- Select JPEG as the format and use the slider to trade file size against quality.
- Choose where to save the file, rename it if you like, then tap Save.
In the iOS 27 version of that guide, exporting a PDF to an image format also shows a Resolution box where you enter a value in pixels per inch or per centimetre. Type 150 for everyday use.
Google’s Android help doesn’t describe a built-in PDF-to-image feature. Open the browser tool in Chrome, or take a screenshot. Google’s Android screenshot guide says to press the Power and Volume down buttons together, or, if that doesn’t work, hold Power for a few seconds and tap Screenshot. The same resolution limit applies as on Windows: you get your phone’s screen, not the page at print quality.
Which dpi to choose, worked out for an A4 page
A PDF measures pages in points, 72 to the inch. When a page becomes an image, the dpi you choose decides how many pixels each inch gets. An A4 sheet is 210 × 297 mm under the ISO 216 paper-size standard, which is 8.27 × 11.69 inches. Multiply each side by the dpi and you have the image size. At 150 dpi, the width is 210 ÷ 25.4 × 150 = 1240.2, so 1240 pixels.
| Setting | Width (px) | Height (px) | Megapixels | Good for |
|---|---|---|---|---|
| 72 dpi | 595 | 842 | 0.50 | Thumbnails, quick previews |
| 150 dpi | 1240 | 1754 | 2.17 | Screens, email, upload forms |
| 300 dpi | 2480 | 3508 | 8.70 | Printing, zooming into small print |
Doubling the dpi quadruples the pixel count, so 300 dpi has four times the pixels of 150 dpi and takes noticeably longer to render on a phone. For most people, 150 dpi is plenty. A US Letter page (8.5 × 11 inches) works the same way: 1275 × 1650 pixels at 150 dpi.
JPG or PNG for pages of text
JPG compresses by smoothing fine detail, which suits photos and scans but leaves faint smudges around sharp black-on-white edges. PNG is lossless, so letters and lines stay crisp. In a quick test with a text-only A4 page, the PNG was smaller than the JPG at every resolution (485 KB against 690 KB at 150 dpi).
So for plain text, PNG is sharper and usually smaller. The picture flips when a page is full of photographs: a test page covered in a photographic texture came out at about 4.3 MB as PNG and 0.7 MB as JPG. (Your exact sizes will differ a little, because browsers use their own encoders.) So use JPG for scans, brochures and photo pages, and convert to PNG for contracts, forms and slides that are mostly words. Our PNG vs JPG guide covers the trade-off in more detail.
Multi-page PDFs: one image per page
A JPG holds a single picture, so a ten-page PDF becomes ten images. The browser tool names them after the file and the page, such as lease-page1.jpg, lease-page2.jpg, and bundles them into one zip so you aren’t clicking through ten downloads. Each page also appears in a list under the tool, so you can save one on its own.
You rarely need every page. The Pages box accepts single numbers, ranges and the word end, so 1, 4-6 gives you four images and 10-end takes everything from page 10 onwards. If an upload form wants a single file and accepts PDF, it’s often better to cut the PDF down rather than convert it: extract just the pages you need into a new PDF and the text stays searchable.
If a portal rejects your JPG for being too large, try 150 dpi before reaching for a compressor. Dropping from 300 to 150 dpi cuts the pixel count by three quarters.
Questions people ask
Can I convert a PDF to JPG without installing anything?
Yes. A browser tool such as Lokafile’s PDF to JPG renders the pages inside the browser you already have, on Windows, Mac, iPhone or Android. Nothing is installed and the PDF is not uploaded. On a Mac, Preview can also export a PDF as JPEG.
What dpi should I use to convert a PDF to JPG?
Use 150 dpi for screens, email and upload forms. An A4 page then comes out at 1240 by 1754 pixels, which is sharp on any laptop or phone. Pick 300 dpi only if you plan to print the image or need to zoom into small text.
Why is my converted JPG blurry?
Usually because it was captured at screen resolution, for example with a screenshot, or exported at 72 dpi. An A4 page at 72 dpi is only 595 pixels wide. Convert again at 150 or 300 dpi and small text will be readable.
How do I convert a multi-page PDF into separate JPGs?
Use a converter that makes one image per page. Lokafile’s tool renders every page, or just the pages you type, and downloads several pages together as a single zip file with the images named by page number.
Is JPG or PNG better for a PDF that is mostly text?
PNG. It keeps the edges of letters perfectly clean, and for plain text pages it is often the smaller file too. In our test of a text-only A4 page at 150 dpi, the PNG was about 485 KB and the JPG about 690 KB.